
I am really pleased to introduce my friend Emily from The Reading Tutor/OG blog to do a guest post for us about her amazing work.
Please scroll down to continue participating in the Aussie Christmas - Santa Down Under Blog Hop or to pick up some freebies for studying Christmas in Australia, or to learn about some Aussie Christmas picture books. It is a couple of posts below this one. If you would like to participate in the blog hop, you are more than welcome to and pick up some freebies or learn more about Christmas in Australia...It starts here :)
So over to Emily...welcome to my blog :)


The teacher dictates a word to the student(s). Total face contact is necessary so the child sees the formation of the word on the adult's lips.

The student repeats the word back out loud.

Starting with the thumb, the child sounds out the word out loud, holding up one finger for each sound. Make sure they are saying each sound out loud. Step 3 is a critical step. You'll be able to tell which sounds the student hears right away. If a child really struggles with this step, I use a sound slider technique. I have a row of blank Elkonin boxes typed up on a blank card. Then I hand them plastic counters to literally slide one counter up into each box for every sound they hear. Sometimes I see children that can't break beginning or final consonant blends apart, so they need this support.This may be just the thing needed if you have someone with weak phonemic awareness.

Starting with the thumb, students will finger spell the word, holding up one finger for each letter. Make sure they are saying the letters out loud. Again, you'll be able to assess whether your student(s) is applying the phonics and spelling strategies you've taught them. I notice a lot of self talk and reflection during this step. You can really see those wheels turning in their minds! This step tells me whether they need more practice with a particular phonogram or spelling pattern in future lessons.

Now comes the writing part. The student will write the word out loud as they write it on their dictation paper. They see and hear the word as they write which is one of the hallmarks of multi-sensory teaching.

Finally, the student reads the word out loud. This is an important time to for them to do a quick self reflection on whether the word looks right to them. Always place that ownership on the child!
You may be wondering after reading all these steps two things:
1. How many words do you give? Answer: I usually give anywhere from 8-12 words.
2. How long does this take? Typically, it will take about 10 minutes max.
You the teacher should always make a judgement call about a child's comfort level. If they are really struggling and frustrated, cut the dictation short. That tells you right away adjustments in pacing need to be made. One last tip: I am a real stickler for a child following these steps correctly EVERY time. I give gentle reminders, but the minute you let up on one step, I find they develop their own variations, Those habits can be hard to break.
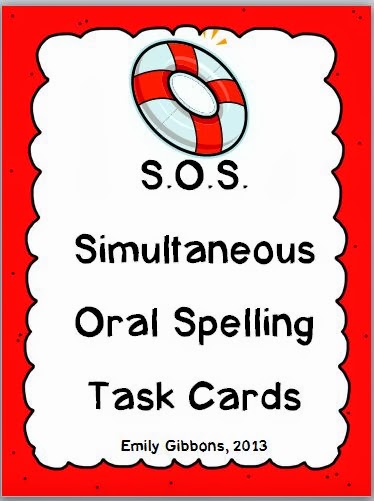
If you enjoyed reading about this strategy and would like to try it out, I've created a set of task cards with the 6 steps written on them, as well as a recording sheet. This product is available in my Teachers Pay Teachers store:
Thank you so much for reading my post today! I've love to hear from you in the comments below. Be sure to follow me on Bloglovin, by clicking the book icon with the heart on it in the right sidebar.
Credits:
The Orton-Gillingham Manual by Anna Gillingham and Bessie Stillman, 1997
Now head on over to the next stop in the Traveling Tuesday Blog Swap to Teacher Mom Of Three. Have a great day learning new and exciting Reading strategies!

Love, love, love this idea! I wish I would have had this earlier to help my son. I am definitely going to try it with him anyway, even though he is 9 years old!
ReplyDeleteAndrea
Reading Toward the Stars
Hi Andrea
DeleteI use this strategy with nine and ten year old students :) Thanks for organising the Trading Places Tuesday blog link up :)
Kylie
Oops Andrea, I just realised you weren't talking about my 4H reading comprehension strategy, but you were commenting on Emily's guest blog...sorry!!! Kylie
DeleteThanks for sharing Emily:) We have been using Spelling Power which has a similar checklist...I really like this oral side to the phonetics though - I'm going to try it with some of my kids that have a more difficult time with spelling!
ReplyDeleteThanks for taking the time to read Emily's guest post Dinah and also for leaving feedback :) Kylie
DeleteThis comment has been removed by the author.
ReplyDelete